Weed puller vs herbicide: the quick answer
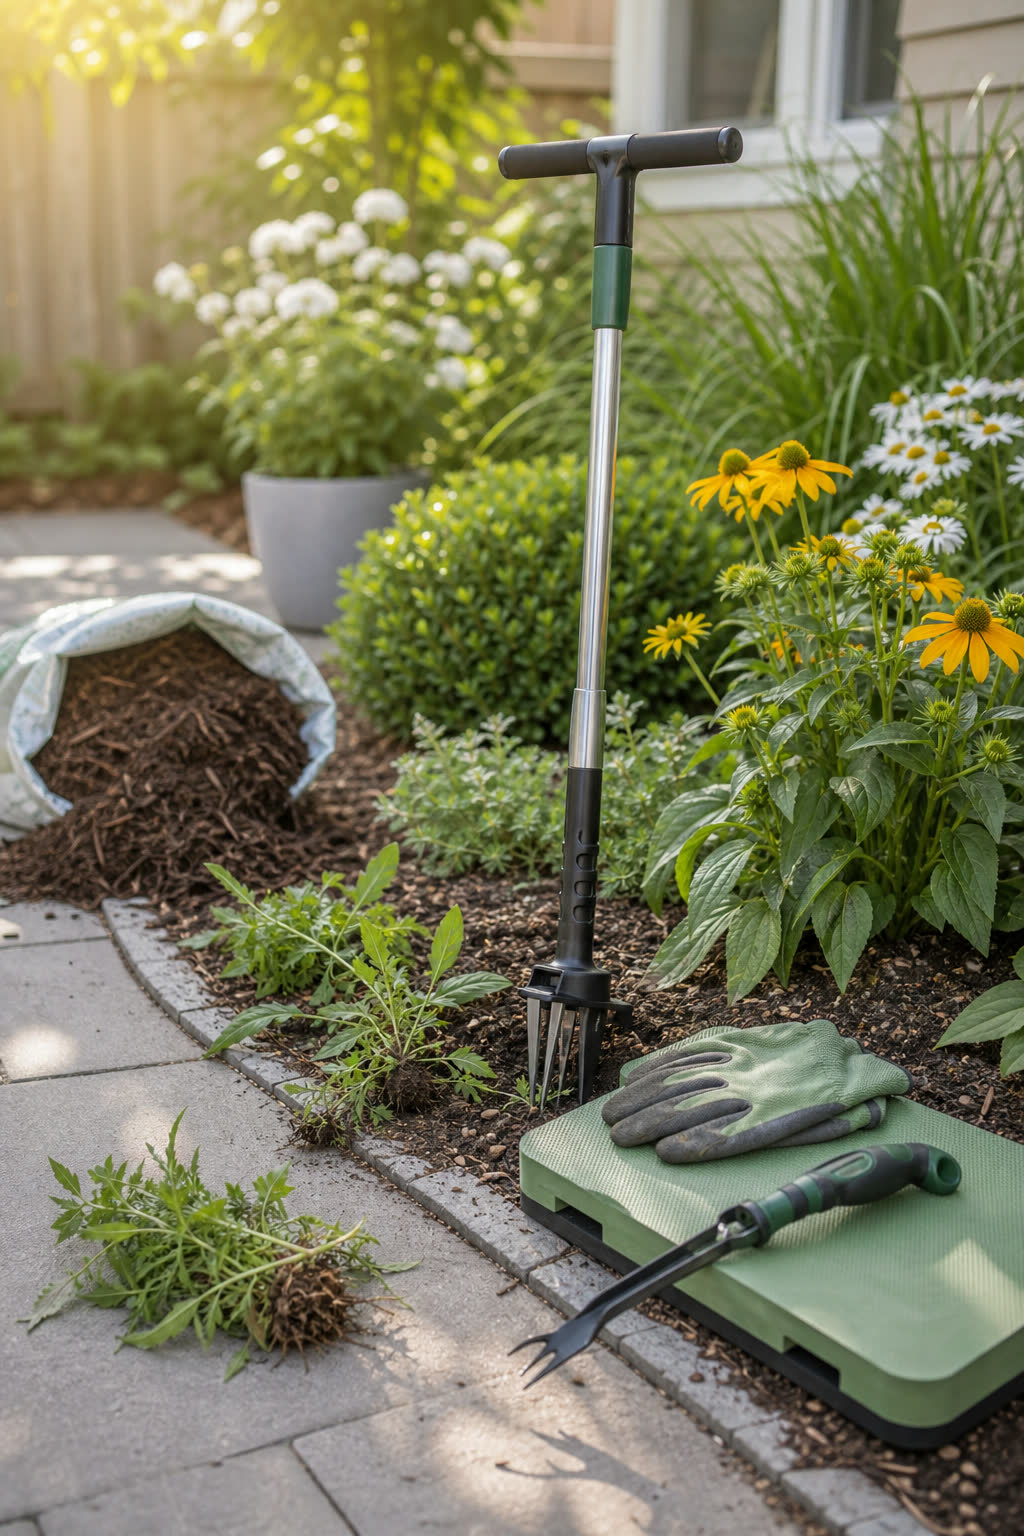
Pull scattered, identified weeds when you can reach their crowns and roots without harming nearby plants. A stand-up puller suits isolated taproots in open lawn. A narrow hand weeder gives more control beside flowers, vegetables, edging, and irrigation lines. Removal may need follow-up; a clean-looking patch is not proof of lasting control.
Hoe young annual weeds when they are small and the soil surface is open. A shallow pass can remove several seedlings at once. Do not chop an unknown creeping perennial into pieces; some weeds can regrow from roots, rhizomes, stolons, or tubers.
Consider herbicide only after you identify the weed and confirm that the exact product label allows the use site. “Kills weeds” is not enough. A lawn, vegetable bed, gravel path, and flower border can require different products and precautions.
Do this before buying
Run one 10-minute weed test
- Choose one small patch of identified weeds. For an unknown or potentially skin-irritating plant, take a photo without touching it and get identification first. Do not judge the whole yard from the worst corner.
- Photograph one intact plant. Include its leaves, stem, flower or seed head, and the ground around it.
- Loosen the soil. Work after rain or irrigation when the soil is damp, not muddy.
- Dig one sample instead of yanking the top. Look for a single taproot, a fibrous clump, or horizontal creeping parts.
- Mark what surrounds it. Note food crops, flowers, tree roots, turf, drains, wells, pets, and play areas.
- Clear the patch with the least disruptive method. Photograph the removal spots and recheck them weekly. New growth may be a seedling or regrowth from a remaining plant part; do not infer which from location alone. Use the follow-up record to compare several observations.
Match the first move to the root pattern
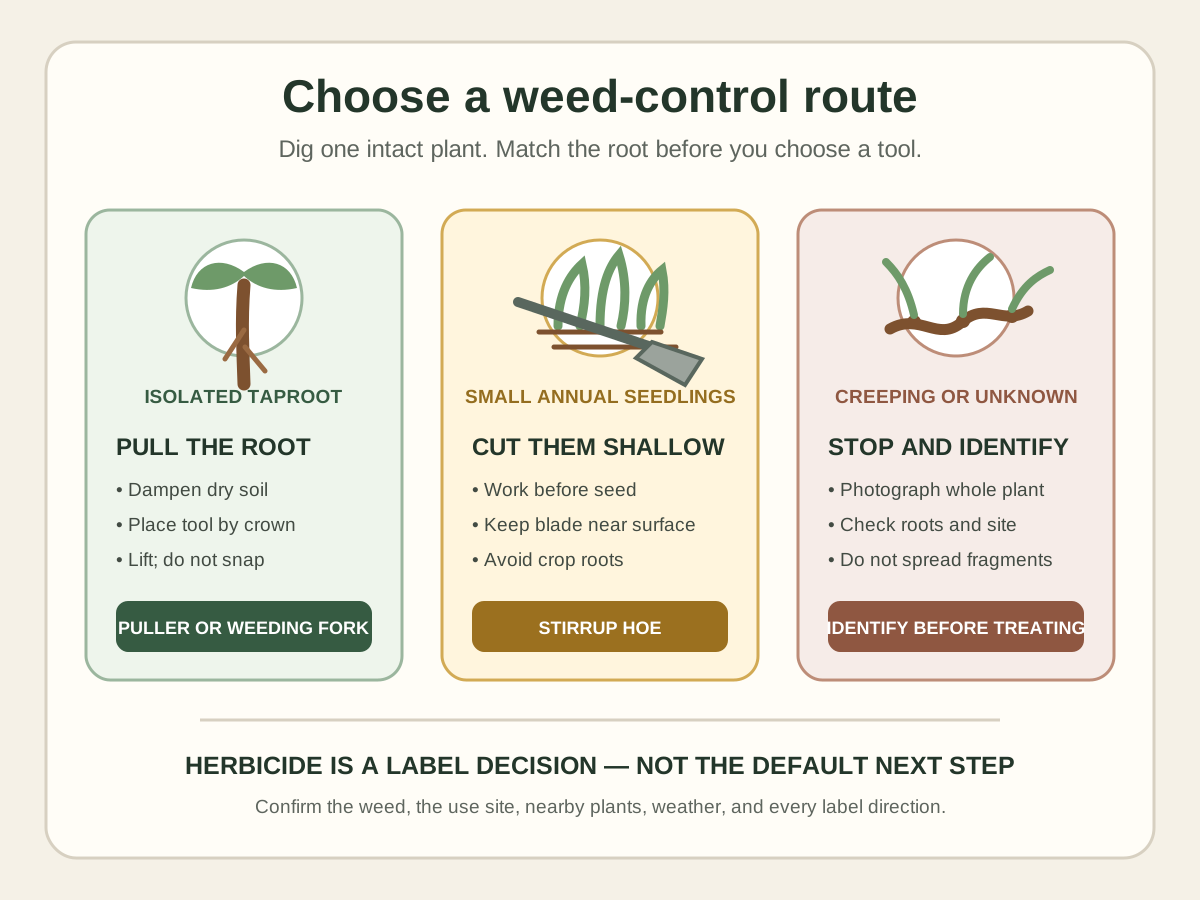
One deep taproot
Loosen the soil, place the tool beside the crown, and lift rather than snap. A dandelion-type root left deep in the soil may regrow.
Many small seedlings
Use a shallow hoe on a dry surface before the plants set seed. Deep cultivation can bring buried weed seed back toward light.
Creeping parts or tubers
Stop and identify the weed. Chopping can spread a perennial when fragments are able to root and grow again.
| What you see | Best first move | Why it fits | Stop signal |
|---|---|---|---|
| A few rosettes in lawn | Stand-up puller or dandelion fork | Targets individual crowns without treating the whole lawn | Tool slips, roots snap, or large soil plugs damage thin turf |
| Small seedlings in open soil | Shallow stirrup hoe | Cuts many young annuals quickly | Desired roots are near the surface or the weed creeps from fragments |
| Weeds beside flowers or vegetables | Hand weeder plus mulch after clearing | Gives precise control around plants you want | You cannot see the crop roots, irrigation tube, or weed crown |
| Dense patch of one identified weed | Use local Extension guidance; then compare manual and labeled options | Species and life cycle determine what can work | The weed or allowed use site is uncertain |
| Unknown plant, vine, sedge, or rash risk | Photograph and identify first | Prevents spreading fragments, skin exposure, and wrong-product use | Do not touch or spray until the risk is known |
Where each manual tool earns its storage space
Stand-up weed puller
A stand-up puller can reduce kneeling for isolated taproots in an open, fairly level lawn. Comfort still depends on the tool and your working position. The jaws or tines need room around the crown, and the leverage can remove a plug of soil with the root.
Skip it in a crowded flower bed, beside shallow irrigation, or when balance on the foot plate feels uncertain. It is also a poor match for a mat-forming weed with many connected stems.
Hand weeder or dandelion fork
Use a narrow hand tool when precision matters more than speed. Slide it beside the root, loosen the soil, and lift the crown. It works between established plants and along edging where a larger puller cannot sit flat.
Skip it when kneeling or repeated gripping causes pain. A long-handled tool, a garden fork you already own, or help from another person may be the better answer.
Stirrup hoe
A stirrup hoe is for many small annual seedlings in open soil. Keep the blade shallow. The goal is to sever young weeds just below the surface, not turn the bed over.
Skip it around shallow crop roots and on weeds that spread from chopped underground parts. Once weeds are large, UC IPM notes that hoes lose much of their advantage.
Original field worksheet · copy into your notes
Before buying a second tool, record five attempts
A tool that pulls quickly but damages neighboring plants or hurts to use is a poor fit. After identifying the weed, try one borrowed or existing tool on up to five similar plants in a safe, accessible spot. Five is a manageable note-taking limit, not a scientifically validated test size. Stop sooner if the task is uncomfortable or destructive.
This record suits scattered, identified weeds. Do not use it to experiment on unknown skin-irritating plants, woody roots, dense creeping infestations, or places where you cannot see irrigation lines and desirable plants. Get identification or site-specific help first.
1. Check working clearance
Measure the gap around the target and compare it with the tool head and its full working movement. Include where your foot, handle, and elbow go. Dormant bulbs and hidden roots still occupy soil.
Weed / site / clear gap / tool:Stop: if the tool would lever against a bulb, plant crown, edging, or water line, change position or method. A narrower head is not permission to work blind.
2. Record each removal
For attempts 1–5, note whether the crown came out, the visible root broke, or only leaves came away. Photograph the removed plant beside its hole. “Looks complete” is an observation, not proof that every underground part is gone.
1: ___ 2: ___ 3: ___ 4: ___ 5: ___Change: repeated breakage calls for a different approach or more suitable soil conditions, not simply more force.
3. Count the whole job
Record setup, removal, collecting debris, and making the surface safe again. Note large soil plugs, disturbed neighboring plants, awkward reach, and grip fatigue. Stop for pain; do not work toward a pain score.
Total minutes / disturbance / comfort:Compare: a fast pull with lengthy cleanup may save no time. A short session that is comfortable may matter more than the number removed.
4. Return to the same spots
Use the photo and a fixed landmark to relocate each removal site. Check about a week later, then during normal follow-up weeding. Record weather and anything growing at or near the original crown position.
Review date / same spot / nearby seedlings:Interpret: same-position growth may come from a remaining plant part, but a new seedling can occupy the same spot. Record uncertain plants as “not yet identified,” not confirmed regrowth. One clear week does not establish permanent control.
Write a purchase rule: “I need a tool that fits ___, removes ___, and avoids ___.” Buy or borrow for that missing function only. Keep your first tool if it works; do not convert a five-plant check into a shopping list.
What a failed trial tells you
The head will not enter: check for stones, dry hard soil, and an unsuitable head rather than jumping on the tool or using its handle as a pry bar. Follow its instructions. Workable, moist soil may ease removal; saturated ground and large muddy plugs are reasons to wait.
The tops snap off: return to the identified root type. A leaf-grabbing action may leave a perennial crown. Dandelions can regrow from remaining root tissue, so quick disappearance is not the same as control. Repeated shallow chopping is also the wrong default for weeds that spread from underground fragments.
The bed is too crowded: work selectively with visibility of the target, or seek help when roots are intertwined. Do not run a broad hoe through a bulb bed because it worked on open soil. Shallow cultivation suits small annual seedlings; careless cultivation can damage wanted plants and bring buried weed seed up.
The weeds keep arriving: separate a tool problem from an open-site problem. New seedlings across bare ground call for prevention as well as removal. In thin lawn, use the bare-patch record to examine traffic, light, and water before replacing grass or buying a stronger puller.
Technical basis: UC IPM on handweeding and cultivation and dandelion biology and management. The five-attempt record is our comparison aid. It is not a product test, eradication guarantee, or medical assessment.
When herbicide may be reasonable
A manual-only plan is not realistic for every body, every weed, or every neglected patch. A labeled herbicide can be a targeted tool when all four statements below are true:
- You can identify the weed or have local Extension help identifying it.
- The label names the place you intend to treat, such as a particular turf type or landscape area.
- The label's target weeds and application timing match what is growing now.
- You can follow every direction for weather, protective equipment, pets, children, nearby plants, water, cleanup, storage, and disposal.
The label is the decision
EPA pesticide labels are legally enforceable directions. Apply only to the listed treatment area and only in the stated way. Calm weather does not turn the wrong product into the right product, and extra product does not repair a wrong identification.
Spray drift is one reason a small yard needs extra care: desirable plants, play areas, neighboring property, drains, and water can sit close to the target. EPA recommends directing a pesticide only to the treatment area and following label instructions for weather and runoff.
Do not substitute a homemade salt, bleach, dish-soap, or strong-vinegar mixture because it sounds more natural. Penn State Extension warns that salt can persist and damage soil and nearby plants, while household vinegar may burn young leaves without controlling perennial roots.
Original decision aid · follow the pattern
Weeds came back: decide what to change before buying a stronger tool
A new flush of seedlings and a surviving underground plant need different follow-up. Compare the new growth with your earlier photo. Use the cards below to choose the next observation, not to name a species from its location. Several patterns can occur in the same bed.
Small plants scattered across bare soil
Check: are the plants separate, with different leaf shapes or sizes? Is the exposed area wider than the original removal holes?
Next move: identify a representative plant before selecting shallow removal or soil cover. Work around wanted roots. A stronger puller does not close the bare space where seedlings keep appearing.
Do not conclude: that every seedling came from the roots you broke last time.
Growth at an old crown position
Check: use a fixed landmark in the photo, not memory. Does the new shoot emerge from a visible remaining crown, or is that connection uncertain?
Next move: revisit the identified weed's root type and removal method. Where inspection would damage neighboring plants, stop digging and get identification help.
Do not conclude: that one clear week proves complete removal, or that location alone proves regrowth.
A line of shoots enters from the bed edge
Check: photograph where the line starts and ends. Look for visible connected stems without pulling through bulbs or established roots.
Next move: identify the spreading plant and include the source edge in the plan. Isolated crown pulling may leave the connected growth outside the cleared patch.
Do not conclude: that a deeper edging product will solve an unidentified grass or underground network.
Plants root in debris over stone or fabric
Check: examine one accessible spot. Is there a layer of leaves and fine material above the surface? Are roots entangled with fabric?
Next move: remove identified young weeds selectively and address debris collection. Compare a more serviceable surface in the surface maintenance guide.
Do not conclude: that another layer of fabric eliminates future maintenance.
These are observation prompts, not a weed-identification key or proof of treatment failure. If the pattern is mixed, mark a small, recognizable area and follow it separately instead of changing the whole yard at once.
Follow up without repeatedly disturbing the whole bed
- Locate the return. Take an overview from the same position, then a close photo with a ruler held beside the plant if it is safe to approach. Note the date, recent rain, and any soil disturbance since clearing.
- Choose the smallest workable action. Remove identified young annuals before seed. Avoid deep routine cultivation: it can expose buried seed, harm desirable roots, and spread some perennial parts. Stop when the target is intertwined with a plant you want to keep.
- Address the opening. Once the weed-control plan is in place, decide whether the bed needs suitable mulch, planting, or a simpler edge. Check the flower-bed guide for access and mulch planning. Do not bury stems or assume covering a creeping perennial finishes the job.
- Compare during ordinary maintenance. Look at the same area on your next yard round and after conditions change. Record new seedlings separately from suspected regrowth. Use the observations to adjust the plan; there is no universal weed-free deadline.
When to ask for identification instead of another purchase
If shoots repeatedly cross the boundary, roots run among established plants, or you cannot tell a sedge from a grass, send a local Extension service clear overview and close-up photos. Include your region, sun exposure, approximate patch dimensions, nearby plants, and what you removed. Describe “shoots along a 3-foot edge” rather than guessing a species. That dimension is an example, not a treatment threshold.
Ask what the plant is, how it spreads, and which options suit this particular bed or lawn. Do not collect or handle unknown irritating plants for the sake of a sample. A species-specific plan may require repeated work or professional help; a new tool is useful only if it supplies a missing function.
Basis: UC IPM's cultivation guidance and University of Maryland Extension's weed-management guidance. A Texas gardener's report of grass returning across a bed edge informed the question this aid addresses; its community plant identification is not a diagnosis for your yard.
Only after the root test
Compare three tools with different jobs
These are broad Amazon searches, not hands-on test winners. Check current dimensions, materials, seller, return terms, and the job the tool is designed to do.
Open lawn + less bending
Stand-up weed puller
Compare jaw or tine shape, foot-plate stability, handle height, weight, and the size of the soil plug it leaves.
Tight beds + precise roots
Dandelion fork or hand weeder
Look for a narrow working end, a handle you can grip, and a blade that can be cleaned without hidden joints.
Open soil + young seedlings
Stirrup hoe
Compare blade width with the gaps in your bed. A wide blade is faster in open rows and clumsy between established plants.
Affiliate links. As an Amazon Associate I earn from qualifying purchases.
Do not buy these by default
- A four-tool kit with overlapping shapes: one tool matched to the root is easier to store and learn.
- A full-yard herbicide for scattered weeds: treat the smallest necessary area only when the label and weed match.
- Mulch before removing established perennial parts: mulch suppresses many annual seedlings but does not erase every rooted perennial.
- A sharp hand tool without a storage plan: keep blades away from children, pets, and the bottom of an open tote.
Questions first-time yard owners ask
Is it easier to pull weeds after rain?
Damp soil often releases roots more cleanly than dry, compacted soil. Wait until the ground is workable rather than saturated. If every pull removes a large muddy plug, let the area drain before trying again.
Will a weed grow back if the root breaks?
Some will and some will not. Annual seedlings are different from taproot weeds and creeping perennials. That is why digging one intact sample and identifying its life cycle is more useful than assuming every broken root behaves the same way.
Should I pull weeds before mulching?
Yes, especially established perennials and anything with rhizomes, stolons, tubers, or a substantial crown. UC IPM recommends preparing the site first; after that, mulch plus occasional hand pulling can handle many new annual seedlings.
What if I cannot kneel or pull for long?
Do not turn pain into a test of willpower. Try a stand-up tool on one patch, divide the work into short sessions, borrow a suitable tool, or ask for help. If chemical control is the practical route, identify the weed and follow a product label that covers the exact site.
Can I use herbicide beside vegetables?
Only if the exact label allows that crop or use site and you can follow its directions. Do not infer safety from the active ingredient or from a product used elsewhere in the yard. When the label does not name the use, choose another method or ask your local Extension office.
Sources and limits
- UC Statewide IPM Program: Handweeding and Cultivation
- UC Statewide IPM Program: Weed Management in Landscapes
- UC Statewide IPM Program: Weed Management in Lawns
- US EPA: Introduction to Pesticide Labels
- US EPA: Introduction to Pesticide Drift
- Penn State Extension: Manage Poison Ivy Safely
We have not tested a weed-control brand or herbicide hands-on. Weed species, pesticide registrations, and permitted uses vary by place and can change. Use the current product label and local Extension guidance. This page does not replace either one.
Plan the next small-yard task
- Build a lower-maintenance flower bed after the weed pressure is under control.
- Compare clover, grass, and a mixed lawn before changing the whole lawn.
- Use the beginner yard-care checklist to avoid buying a garage full of tools at once.
- Plan a spring cleanup around the debris and pruning work you actually have.