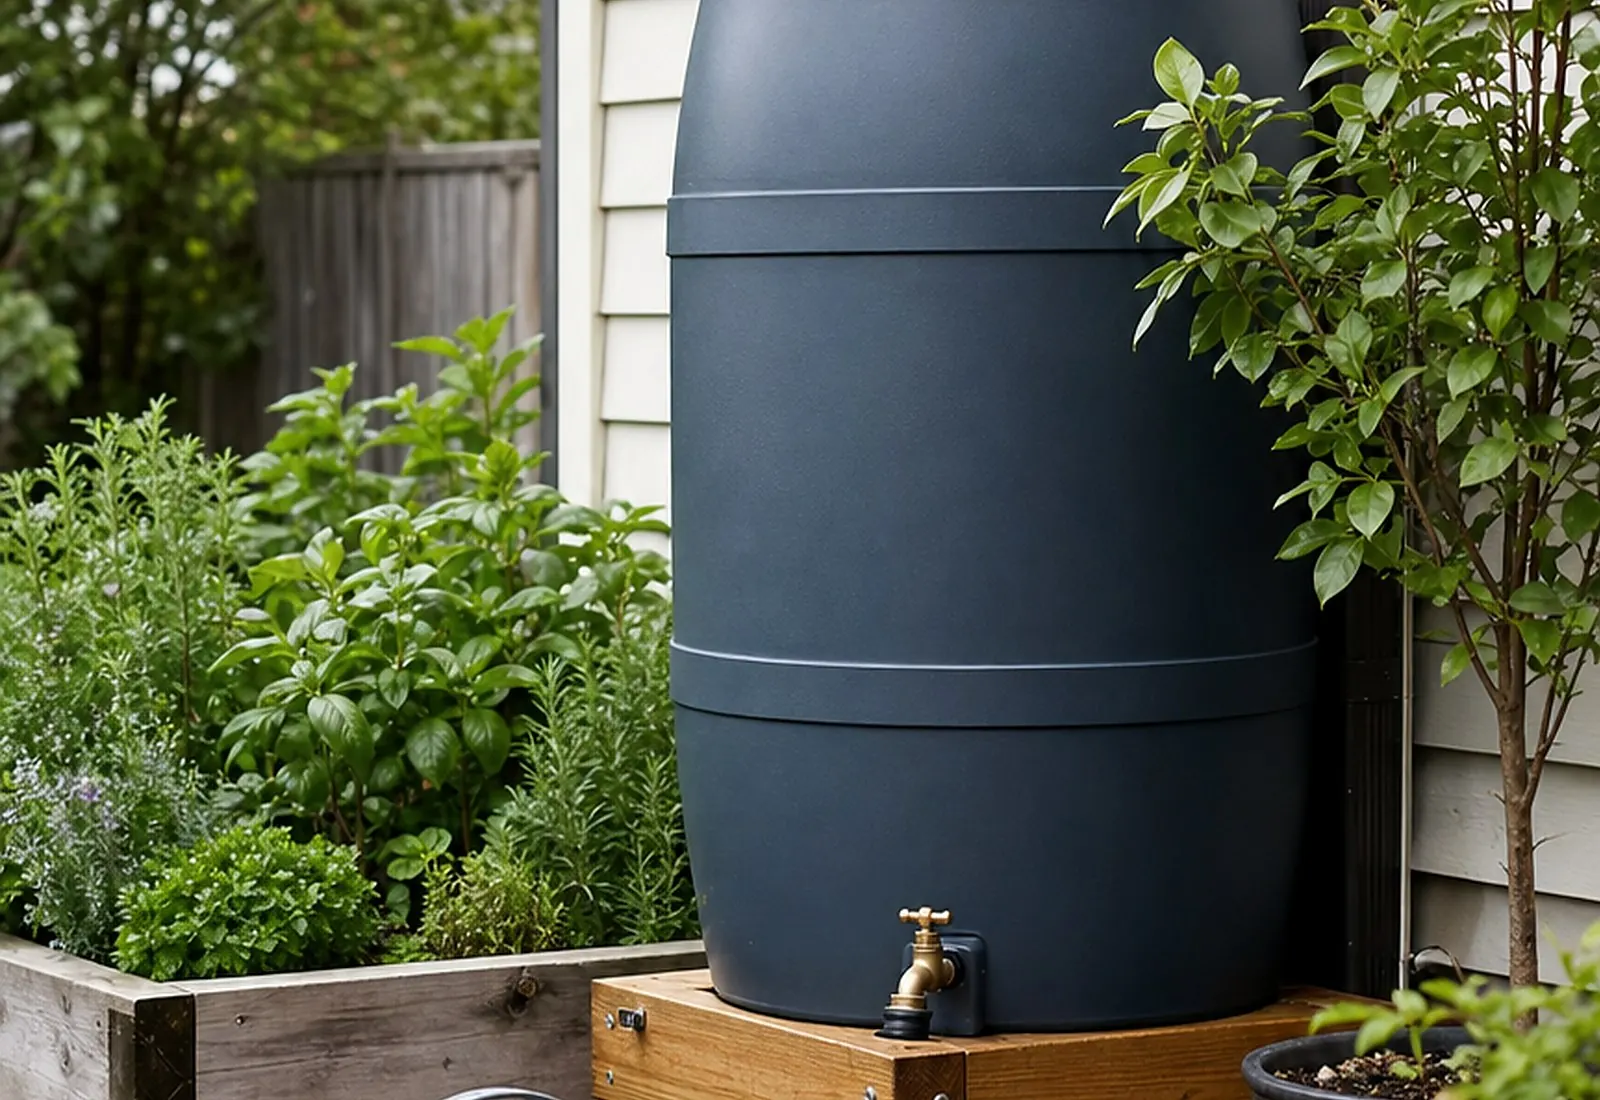
A rain barrel is best for filling a watering can, watering ornamental plants near the downspout, or feeding a simple low-pressure setup that you have tested by hand. It is a poor substitute for a pressurized hose bib when the goal is a long soaker hose, standard drip emitters, sprinklers, or an automatic timer that needs reliable pressure.
Community questions about rain barrels usually fail at the same point: the barrel fills, the first few feet flow, and then pressure, clogging, or overflow turns the project into a guess. Solve those physical limits before comparing decorative barrels.

The 5 checks to make before you buy
| Check | What to verify | Stop if |
|---|---|---|
| 1. Collection point | Roof surface, gutter condition, downspout size, and space beside it | The roof runoff does not suit the way you plan to use the water |
| 2. Overflow | A hose or extension can carry excess water away from the foundation, walking route, and neighbor | The only route sends water toward the house, across a path, or onto someone else's property |
| 3. Base | Level footprint and support for the filled weight, not the empty barrel | The ground is soft, sloped, or too narrow for full base support |
| 4. Spigot access | Watering-can height, hose connection, and room for your hand to turn the valve | The spigot will sit too low or face an obstruction |
| 5. Upkeep and rules | Screened inlet, covered lid, screened overflow, winter drain plan, and local or HOA requirements | You cannot keep the barrel covered, screened, drained, or permitted |
1. Check the roof and downspout together
Choose one downspout that is easy to reach without blocking a gate, meter, vent, or walkway. Watch it during rain if you can. A downspout that already floods a path or foundation corner is not ready for a barrel.
Measure the downspout width and depth before choosing a diverter. Diverter kits are not universal, and the winter return path matters as much as the summer collection path.
Decide how you will use the water before you collect it. The U.S. EPA notes that roof runoff can pick up bacteria from animals and chemicals from roofing materials. Do not treat rain-barrel water as drinking water. For edible plants, check guidance for your roof type and location.
2. Draw the overflow route
Assume the barrel will fill. Rutgers Cooperative Extension gives a simple scale: a 50-gallon barrel can be overwhelmed by the runoff from a modest roof section in one storm. The excess water must still go somewhere.
Run the overflow hose to a place where water can spread without reaching the foundation, crossing a walkway, or entering a neighbor's property. Rutgers recommends directing overflow to a pervious area when possible and gives foundation-distance guidance for basements and crawl spaces. Local drainage rules can be stricter, so treat that as a planning prompt, not a universal code rule.
Keep the outlet visible. A buried, kinked, or hidden overflow turns the full barrel into a foundation and slip hazard.
3. Size the base for the filled weight
Water weighs about 8.329 pounds per gallon at 70 F, according to the U.S. Geological Survey. The numbers below are water only. Add the barrel, fittings, and stand.
| Capacity | Water weight | Base check |
|---|---|---|
| 30 gallons | About 250 lb | Full barrel base sits on one level surface |
| 50 gallons | About 416 lb | Stand rating exceeds the total filled weight |
| 55 gallons | About 458 lb | No loose, tilted, or partial support |
Use a flat, level platform that supports the whole base. Do not estimate from the empty barrel. If the ground settles after rain, fix the base before filling again.
4. Measure what must fit below the spigot
Measure your watering can from the floor to its highest point, then add room to tip it out. If you plan to attach a hose, leave space for the connector, the bend, and your hand. A stand raises the spigot and adds a little gravity pressure, but it also raises the center of mass.
Measure the vertical difference between the water surface and the outlet you want to feed, not just the stand height. That difference shrinks as the barrel empties. Rain Bird gives the conversion as 0.433 psi per foot of elevation. This estimates static pressure before flow losses; it does not predict how much water reaches a plant.
For example, a water surface 3 feet above an emitter gives about 1.30 psi of static head; at 1 foot it gives about 0.43 psi. These are hypothetical measurements, not a tested barrel. Hose friction, fittings and filters reduce the pressure available while water moves. Do not stack a higher improvised stand to chase a pressure target.
5. Plan the screen, lid, winter, and local checks
Use a covered barrel with screened inlet and overflow openings to keep out debris, mosquitoes, children, and animals. The CDC recommends tightly covering rain barrels and using mesh smaller than adult mosquitoes where there is no lid. Rutgers also warns that mosquitoes can enter through overflow openings.
Clean the screen when leaves, seeds, and roof grit collect. In a freezing climate, use the winter bypass and storage sequence below before freezing conditions arrive.
Check your municipality, water utility, and HOA before cutting a downspout. Some areas offer approved barrels or rebates. Others set rules for overflow, placement, or collected-water use.
Winterize the water route, not just the barrel
An empty barrel is not winter-ready if the next rain can fill it again. Identify how your exact diverter or downspout restores the normal drainage route. Then plan draining, component storage and a follow-up check. This section is for ordinary seasonal barrels exposed to freezing, not engineered year-round cisterns.
Nebraska Extension's rain-barrel guidance calls for winter disconnection, restored downspouts and storage that prevents refilling. It also warns against routing overflow toward foundations, neighboring property or impermeable walking surfaces. Use that principle with the instructions for your own barrel and diverter; different kits do not share one winter cap or valve setting.
1. Identify the bypass before disconnecting anything
From ground level, photograph the inlet, diverter, downspout and existing discharge point. Find the model instructions and the original winter plug, connector or removed downspout section. Label which piece belongs at each connection. If you cannot establish the winter configuration, ask the maker or installer before dismantling the route.
Do not leave a shortened downspout aimed at the wall while you shop for an extension. Measure the connection's shape and size, then the actual route to its approved destination. A longer tube is not automatically a suitable fix if it crosses the only path, collects water in a low bend or moves the problem to a neighbor.
2. Empty without moving the filled load
Choose a suitable discharge location and work before ice makes the ground slippery. Follow the barrel instructions for draining and isolating the inlet. Do not tip or lift a partly full barrel off its stand. Water below the spigot, connected hoses and accessories may need separate attention; a stopped spigot flow does not prove every component is empty.
For linked barrels, list each container and connecting hose separately. One open valve does not establish that the entire chain drained. Pumps, filters and timers have their own shutdown instructions. Do not improvise an electric heater, antifreeze addition or compressed-air procedure from a forum reply.
3. Store the empty parts where they can be found
Inspect accessible fittings, screens and the barrel body for visible damage while following the maker's cleaning instructions. Record damaged parts rather than tightening until something cracks. Store the empty barrel in its approved position and location, secured as directed. Protect openings from unintended collection and access; do not assume every barrel can be inverted without stressing its lid or fittings.
Keep small removable parts in a labeled container with the model reference. Reserve their shelf space before taking the system apart. Use the seasonal storage record if this competes with tools for your only dry spot.
Original seasonal handoff card
Barrel offline, drainage still working
Copy this card for each barrel or linked group. No submission or site storage; screenshot your entries before leaving.
Complete only when: the collection inlet is isolated as directed, draining/storage steps are done and the roof still has a suitable water route. If the next-rain check has not happened, mark it pending.
4. Recheck the bypass, then make a spring restart decision
Observe the next safe opportunity after rain from ground level. Look for a disconnected extension, new pooling and water reaching the path or foundation. Stop using a route that causes these problems and arrange a suitable repair. A dry-day photo alone does not verify performance in rain.
In spring, inspect the base, barrel, fittings, screen and overflow before reconnecting under the manufacturer's and local weather guidance. Do not use a fixed calendar date as evidence that freeze risk has passed. Recheck low-water delivery if the watering layout changed. Buy only the missing compatible part after this record identifies it; the four shopping roles below remain options, not an annual replacement list.
Can a rain barrel run a soaker hose or drip system?
Sometimes, but only if the parts are designed for low pressure and the run is short enough to test. A rain barrel is not a normal faucet. Standard emitters, pressure-regulated soaker hoses, hose timers, and long split runs may expect more pressure and cleaner water than a gravity barrel can provide.
Test the same layout at a high level and at the lowest level you intend to use. Passing with a full barrel does not establish that the last watering will work. First read the stated operating pressure or gravity-head requirement for every part, including filters and timers. If the requirement is unknown, compatibility is unverified.
Keep the test comparable
- Confirm the stable base, screened openings and safe overflow first. Use a nearby ornamental watering area, not drinking-water equipment.
- Mark the two water levels externally if possible. Do not reach inside or remove required covers to measure. Record height from each surface level to the same outlet elevation.
- Connect the exact supply hose, filter and fittings you plan to use. Lay the hose on its final route. Record its length, elevation changes and valve position.
- With irrigation disconnected, collect water at the supply-hose end for a timed interval. Record both volume and seconds. Keep the outlet elevation and valve position the same for the second test.
- Reconnect the irrigation line. For accessible individual emitters, use equal collection times at the beginning, middle and end. Do not lift emitters to different heights to fit a cup. For a soaker hose, record the wetting pattern instead; a bucket at its end cannot measure seepage along its length.
- After normal use brings the barrel to the lower mark, repeat the same tests. Do not waste a full barrel solely to lower it. Note any cleaning, rain refill or layout change that prevents a fair comparison.
Let the line finish filling before you start a comparison, and use the same settling procedure each time. If the water level falls visibly during collection, record both start and end levels. Repeat a surprising result before buying a different part.
Original field worksheet
Two-water-level delivery record
One barrel, one route, the same test duration. Write units beside every number. Record what happened, not whether the kit is advertised as gravity-fed.
Fields stay only on this page; they are not submitted or saved by this site. Copy your notes or take a screenshot before leaving.
Small Yard Starter · rain-barrel-starter-guide · This is a comparison record, not a pump specification or irrigation safety approval.
Read the results before buying a timer
Hypothetical supply test: 2 litres in 60 seconds is 2 L/min. At the lower mark, 1 litre in 60 seconds is 1 L/min. The second flow is half the first. It does not follow that twice the run time fixes the bed: some emitters may stop or distribute water unevenly. For US gallons, volume × 60 ÷ seconds gives gallons per minute; do not label that result gallons per hour.
Supply is weak at both levels
Check the valve opening, kink, screen and filter using their maintenance instructions. Retest the same route after one change. A larger barrel does not remove a restriction.
Supply drops as the barrel empties
Record the lowest workable level. Consider hand watering or a smaller gravity-rated zone. More stored gallons alone do not hold the water surface at the same height.
Near end works; far end does not
Recheck layout and the exact line's operating range. A shorter zone may be worth testing, but there is no universal safe run length. Do not automate an uneven result.
Both levels appear workable
Check soil wetting around the plants, not only outlet flow. Repeat after normal use and filter inspection. This is a local observation, not a promise that the system will run unattended.
For a line-by-line watering check, use the drip versus soaker guide. If overflow is the real failure, solve the water route before adding irrigation parts. A pump is a separate design decision involving pressure, power and compatible equipment, not the default fix for an unmeasured line.
Where rain-barrel water fits best
Use rain-barrel water first on ornamental beds, shrubs, containers, and houseplants where local guidance allows it. The University of Minnesota Extension is conservative for edible plants: it says rain-barrel water is non-potable and generally should not touch edible plant parts. EPA and Rutgers both flag roof runoff quality as a real consideration.
If you use it near edible gardens anyway, keep it at the soil line, avoid overhead watering, wash harvests with potable water, and follow your local Extension or health guidance. Skip rain-barrel water after roof chemical treatments unless a qualified local source says otherwise.
Choose only the parts your layout needs
Finish the five checks first. Then compare only the parts that solve a measured need.
Rain barrel
Compare total width, inlet type, lid and screen, spigot height, drain point, and winter instructions. A smaller barrel is the better choice when it keeps the path clear and fits a fully supported base.
Compare: Rain barrelsCompare on Amazon
Diverter or overflow kit
Match the kit to the downspout dimensions, barrel inlet, and overflow route. Check what happens when the barrel is full and how the downspout returns to normal for winter.
Compare: Diverter and overflow kitsCompare on Amazon
Rated stand
Use the maker's load rating and the barrel's filled weight. The stand must support the whole base on level ground, fit the can under the spigot, and still leave the overflow route clear.
Compare: Rain barrel standsCompare on Amazon
Low-pressure watering parts
Shop here only after the bucket and line test. Look for parts explicitly meant for gravity or low-pressure use, and include filtration where the system has small emitters. Skip standard hose-bib parts that list pressure requirements your barrel cannot meet.
Compare: Low-pressure drip and soaker partsCompare on Amazon
Affiliate links. As an Amazon Associate I earn from qualifying purchases.
When a rain barrel is the wrong fix
- Skip it when there is no overflow route away from the foundation and walking path.
- Skip it when the only base is soft, sloped, narrow, or likely to be bumped.
- Use a smaller barrel when a 50- or 55-gallon model would block a gate or side path.
- Use a watering can or normal hose when you have only one or two pots and the upkeep would exceed the water saved.
- Skip automatic irrigation when you cannot inspect the filter, emitters, far end, or overflow after the first few runs.
If the real problem is watering a bed evenly, compare drip irrigation and soaker hoses before adding storage beside the downspout.
Install in this order
- Watch the chosen downspout during rain and mark where water already flows.
- Measure the downspout, barrel footprint, watering can, and overflow route.
- Prepare a level base for the total filled weight.
- Dry-fit the barrel, stand, diverter, spigot access, and overflow hose.
- Fill only partway and check the base and fittings.
- Check the overflow during the next rain before leaving the setup unattended.
Common questions
What size rain barrel should a beginner buy?
Choose the capacity you can use and maintain on a fully supported base without narrowing the walking route. A 30-gallon barrel may fit better than a 55-gallon barrel. Extra capacity is not useful if the overflow or low-water delivery still fails.
Does a rain barrel need a pump?
Not for filling a watering can or slow low-pressure watering near the barrel. A pump may be needed for equipment that requires more pressure, but a pump adds power, noise, fittings, maintenance, and failure points. Check the pressure requirement before buying either item.
How far should a rain barrel be from the house?
The barrel normally sits near the downspout. The important distance is where the overflow ends: it must carry excess water away from the foundation. Follow local drainage guidance for the final outlet.
Can rain-barrel water be used on vegetables?
Roof material, wildlife, local conditions, and watering method all matter. EPA warns that roof runoff can contain bacteria and chemicals. University of Minnesota Extension says rain-barrel water generally should not be used to irrigate or wash edible plants. Follow local extension or health guidance, and never use the water for drinking.
Sources and method
The September 17, 2026 update adds an original two-level delivery record. A Gardening Stack Exchange question about a roughly 15-metre, four-bed layout informed the far-end and pump questions. We did not adopt a universal minimum pressure from forum replies. The conversion above comes from Rain Bird; each component's current instructions still determine its operating range. Examples are arithmetic illustrations, not field tests.
This checklist uses public guidance from the U.S. EPA, University of Minnesota Extension, Rutgers Cooperative Extension, the CDC, and the U.S. Geological Survey. Community discussions were used to identify repeated beginner failure points, not as proof that one product or setup works everywhere. Product details can change, so verify dimensions, load ratings, pressure requirements, and installation instructions before buying. Read how Small Yard Starter puts guides together.