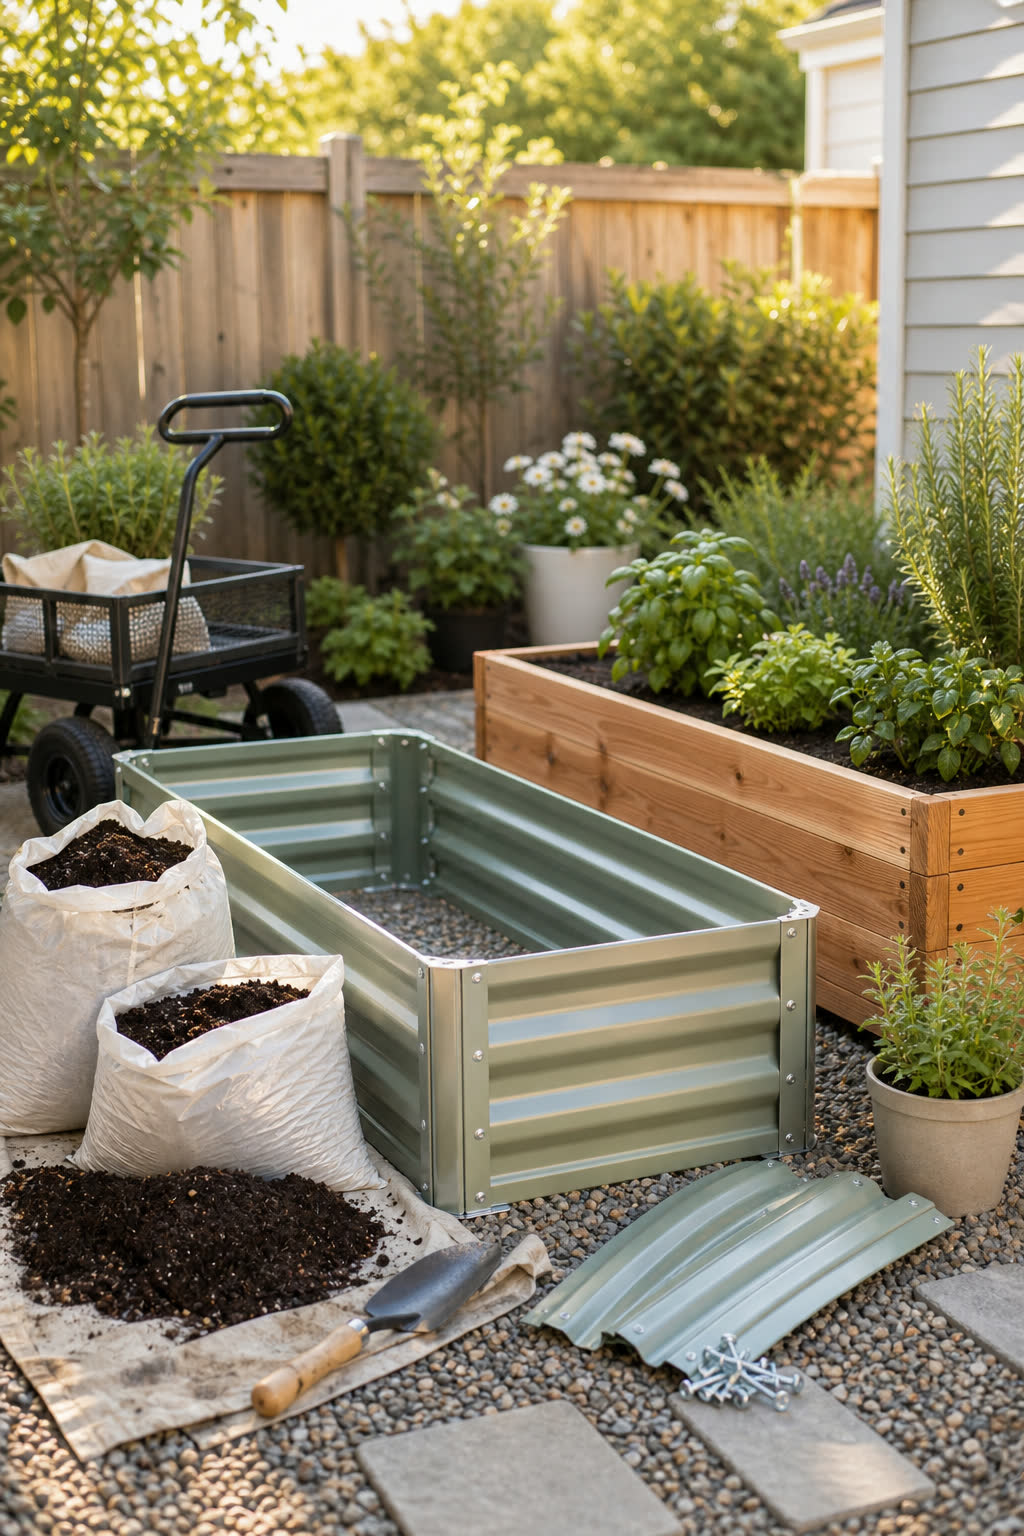
A raised bed listing can look right while describing the wrong kind of product. A bottomless kit expects soil or a prepared permeable site beneath it. A patio planter contains the growing mix. An elevated planter lifts a smaller container to a more comfortable working height.
The first purchase question is therefore not metal versus wood. It is: where can the soil sit, where can water leave, and who must reach the plants?
Patio planter or raised bed: the quick answer
- Choose an enclosed patio planter when loose soil cannot contact the surface and runoff needs a planned collection or drainage route.
- Choose an elevated planter when easier standing access matters more than growing area. Its container is shallower and dries faster than a ground bed.
- Choose a bottomless raised bed kit when it can sit on soil or another approved, permeable ground-level site and you want more root area.
- Do not buy yet when the deck or balcony load, property rules, drainage destination, or only access route is unresolved.
“Raised” describes the soil level, not a sealed base. Product photos often hide the bottom. Read the assembly diagram and parts list before treating any kit as a patio container. If the bed is shallower than 12 inches, assume the crop needs access to loosened soil below unless the seller describes it as a true container.


What each format changes
| Format | What is underneath | Best fit | Main tradeoff |
|---|---|---|---|
| Enclosed patio planter | A solid or lined container with controlled drain openings | Patio use where soil must stay contained | Less soil volume; runoff still needs somewhere to go |
| Elevated planter | A smaller container held above the ground by legs or a stand | Herbs, greens, and easier standing access | Dries faster; legs and surface must carry the wet load |
| Bottomless raised bed kit | Open ground or another approved permeable base | More growing area and root-zone continuity | More fill, more weight, and no built-in runoff containment |
Depth and bottom rules that prevent expensive mistakes
A small-yard raised bed fails most often because the buyer treats a bottomless garden bed like a patio container, or treats a shallow elevated planter like a full vegetable bed. Use the soil below, the crop, and the drainage route to decide how much depth is enough.
| Site condition | Minimum proof before buying | Skip or change plan when |
|---|---|---|
| Bottomless kit on soil | Confirm the base is open, loosen the native soil below, and plan at least 6-12 inches of usable growing mix for common vegetables. | The underlying soil is compacted, contaminated, paved, or blocked by fabric, gravel, plastic, or a liner roots cannot pass. |
| Bed over heavy clay | Check where water stands after rain and add organic matter to improve soil structure before relying on bed height alone. | The site stays marshy or drains toward a foundation, path, basement, or neighbor. Raising the box does not fix a bad outlet. |
| Planter on concrete or patio | Use an actual container or lined planter with drain openings, a legal runoff route, and enough depth for the crop. | The listing is bottomless, drainage would stain or drip below, or the filled weight has not been approved for the surface. |
| Elevated planter on legs | Confirm the container depth, leg stance, drain outlet, and wet load. Choose herbs and greens before deep-rooted crops. | The legs wobble, the tray is shallow, the surface is not level, or daily heat will dry the small soil volume faster than you can manage. |
For a first bed, the safest small-yard move is usually one modest bottomless bed on approved ground or one real patio planter with visible drainage. A two-pack or extra-deep kit only helps after the first site passes the bottom, route, water, and fill checks.
Measure these seven things before choosing a size
- Usable footprint. Mark the outside dimensions, not the planting opening. Include feet, braces, hose fittings, and the path you need around it.
- Your reach. Kneel or stand where access will be. Mark a comfortable reach without leaning on the rim. If both long sides are open, the bed can be up to twice that reach. Against a wall, it cannot.
- Drainage destination. Pour a small measured amount of water where the planter may sit. Watch where it goes. A saucer can catch drips, but it is not permission to create overflow above a neighbor or damage a finished surface.
- Bottom type. Confirm whether the kit is open-bottom, has a liner, includes a floor, or only shows a decorative photo. The parts list matters more than the title.
- Inside fill depth. Measure the usable inside space, not just the panel height. False bottoms, rounded ends, tapering sides, and unfilled headspace change the real volume.
- Delivery route. Measure the narrowest gate, stair, doorway, and turn for panels, assembled parts, soil bags, and the cart that moves them.
- Water route. Make sure the hose or watering can reaches without creating a trip line. Elevated and enclosed containers generally need closer moisture checks because their smaller soil volume can dry faster.
Extension sources converge on the same practical boundary: a ground bed can borrow rooting depth from loosened soil below, while a true container must provide its own depth, drainage, and load support. That difference is more useful than a generic “best kit” label.
Original planning tool
Calculate soil volume and bag count
Use the confirmed inside dimensions of one rectangular planter. Enter the fill depth you plan to use, then include every bed in the pack.
Boundary: this is a rectangular volume estimate, not a structural-load calculation. It does not account for rounded corners, false bottoms, soil settling, drainage layers, or the weight a deck or balcony may safely carry. Wet growing mix and stored water can be far heavier than the empty kit. Ask the property owner or a qualified local professional before placing a loaded planter on an elevated structure.
Original worksheet · fill, remeasure, then top up
How much extra soil should you buy for settling?
Calculate the initial fill, but do not add a universal settling percentage. Different mixes, existing soil and buried organic material change differently. Set a target soil line below the rim, following the planter instructions and allowing room for watering and mulch. A missing volume is not proof that the bed needs compost or fertilizer.
- Measure inside dimensions. Exclude rim thickness and space already occupied. For a rectangular bed, length in feet × width in feet × fill depth in inches ÷ 12 gives cubic feet. The calculator above estimates a whole fill, not the weight a deck can support.
- Make a repeatable reference. Label four corners A–D and the center E. Measure vertically from the same rim reference to the soil at each point before planting. Note slopes, mounds and empty corners rather than hiding them in a single average.
- Fill and water as the mix instructions require. Allow drainage and remeasure before planting. Do not stamp down the mix to force an advertised bag count into the bed. If water pools or soil escapes, solve the drainage or containment problem first.
- Order a top-up from the measured gap. For a level rectangular bed with a reasonably even deficit, use its inside area × missing depth. For uneven fill, divide into measured sections. Leave established plant crowns and stems at their appropriate grade; do not bury them to reach a line.
A measured top-up example
An empty bed with an actual inside footprint of 4 × 2 feet and a planned 10-inch soil depth needs about 6.67 cubic feet. Later, if its surface is evenly 1.5 inches below the target, the extra volume is 4 × 2 × 1.5 ÷ 12 = 1 cubic foot. It is not another full 6.67-cubic-foot fill. These are geometric estimates; rounded corners, braces and actual bag yield change the order.
Your fill and delivery record
Type notes or print this original record. Values are not submitted or saved by this page; copy them before leaving. Record the mix supplier and the same reference points so next season's measurement is comparable.
Compare complete orders, not price per bag
Bag count = round up(required cubic feet ÷ labeled cubic feet per bag). Bag cost = bag count × quoted bag price + delivery. Bulk yards = cubic feet ÷ 27; the bill may use a supplier minimum rather than your exact need. Compare equivalent suitable mixes, taxes, delivery, unloading space and the route through your gate.
Illustrative prices, not offers: 6.67 cubic feet needs five 1.5-cubic-foot bags. At an assumed $8 per bag that is $40 before tax and delivery, with some material left over. A bulk quote with a one-yard minimum would supply 27 cubic feet—too much for this single fill unless you have another verified use and storage space. Get local quotes before choosing.
Surface lower, plants otherwise fine
Measure first. You may only need to adjust the plan between crops, not fill to the rim. Preserve room for mulch and watering. Do not add rich amendments simply to replace missing volume.
Plant growth poor, fill height unchanged
Investigate water, drainage, roots and a suitable soil test. More soil is not a diagnosis, and a routine manure addition can add nutrients the bed does not need.
One corner drops or water ponds
Check leakage, uneven support and blocked outlets. A new bag can conceal the symptom without correcting the cause. Stop loading an unstable container and obtain a safe support plan.
Annual fill costs keep rising
Keep your measurements and mix history. Price a smaller growing area or a suitable, more stable mix rather than assuming every bed needs the same yearly compost allowance.
Checked against University of Maryland Extension's raised-bed soil guidance. Soil-based ground beds and enclosed patio containers are not interchangeable: choose a mix suited to the format and use soil-test recommendations for amendments. The geometry, quote example and record are original planning aids, not a tested product yield or a prescription for fertilizer.
Plan the soil delivery route through your gate before accepting a bulk drop. Check one-zone watering coverage after the final bed layout is fixed.
Worked examples: the pack quantity changes the project
| Layout | Nominal volume | What to notice |
|---|---|---|
| One 4 x 2 ft bed filled 12 in | 8 cu ft, or 0.30 cu yd | A manageable test bed if the site and one delivery route are ready |
| Two 4 x 2 ft beds filled 12 in | 16 cu ft, or 0.59 cu yd | The second bed doubles fill, carrying, watering, and path needs |
| One 9 x 3 ft bed filled 12 in | 27 cu ft, or 1 cu yd | Access from both long sides matters for most users |
| Two 9 x 3 ft beds filled 12 in | 54 cu ft, or 2 cu yd | This is a soil-delivery project, not a casual two-box purchase |
Do not use these examples for an oval or tapered planter. Use its confirmed inside capacity or calculate its actual shape.
Three buying routes after the site passes
These routes are based on format and public listing information, not hands-on tests. Amazon sizes, materials, quantities, and availability can change. Recheck the selected option before ordering.
Choose by use, not by rank
Compare only the route that matches your site
Hard-surface route
Elevated patio planter with drainage
Start here when you need an enclosed container, easier standing access, and a visible drainage outlet. Confirm the base, outlet, wet weight, leg spacing, and where runoff will go. A product search is used because the right size depends on those site facts.
Ground-level one-bed route
Open-bottom raised bed kit
Use this only after confirming the selected size, quantity, height, and open-bottom design. Return to the calculator with the current inside dimensions. Do not order from the default photo alone.
Ground-level patio container
Enclosed planter with drainage
For a hard-surface site where standing-height access is not needed, compare an enclosed planter with usable root depth and an accessible outlet. Confirm the loaded weight and runoff route. Skip an open-bottom kit on a surface that cannot drain appropriately; a tray is not an overflow plan.
These are role-based product searches, not tested model recommendations. Check current dimensions, drainage instructions and load limits. As an Amazon Associate I earn from qualifying purchases.
Common failures that the listing will not solve
- The center cannot be reached. Narrow the bed or reopen the second side. Do not plan to step into the growing mix.
- Water reaches the neighbor below. Stop and redesign the drainage route. A larger tray only delays overflow if no one empties it.
- The planter stays wet. Clear blocked outlets and stop leaving the base in standing water. Do not remove drainage just to keep the surface dry.
- The shallow kit sits on a barrier. Remove the barrier, choose a deeper true container, or switch crops. A 6-inch bed over plastic does not behave like a 6-inch bed over loosened soil.
- The elevated planter dries every afternoon. Check soil moisture, sun exposure, container volume, and plant choice before buying an automatic timer.
- The two-pack has no second site. Buy one bed or keep using containers. A lower unit price does not make the unused footprint useful.
- The fill cost exceeds the kit cost. Recalculate the inside volume, reduce the project, or price bulk delivery. Do not fill the base with construction debris or unknown material.
Finish the setup in the right order
- Confirm property rules, surface, drainage, and completed-load approval where needed.
- Mark one complete footprint and access path.
- Choose the format and current inside dimensions.
- Calculate soil, bag count, and delivery route.
- Assemble and level the planter according to its instructions.
- Add growing mix and plants before choosing irrigation accessories.
If you need to move soil through a tight gate, compare the measured route in the yard cart versus wheelbarrow guide. Once the bed locations are fixed, use the soaker hose versus drip irrigation guide to test one watering zone. For the rest of the tool list, return to Garden Tools for Small Yards.
Sources and limits
The site-planning guidance was checked against University of Minnesota Extension's raised-bed guidance, University of Maryland Extension's raised-bed guidance, Utah State University Extension's rooting-depth and width guidance, and Oregon State University Extension's raised-bed construction guidance. Community questions that exposed the missing decisions included raised beds over clay soil, whether a bed needs a bottom, beds on concrete, and a raised bed that stayed wet. Community examples identify practical questions; they are not product tests or structural advice.